Témoignages
An innovative project with 3D vision for LEM
LEM and Qualimatest collaborate regularly and for a long time in order to develop means of productions and controls "Swiss made".
QMTCheck-M4U Station Project
Fully integrated solutions
Qualimatest has delivered QMTCheck stations with the M4U program. A complete turnkey solution has been delivered: mechanics, optics, software and the interface with the LEM automatic line.
Two highlights for this project
- 3D optical measurement in white light interferometry
- The Best Fit optimization algorithm
At the heart of power electronics, world leader in its sector, LEM offers innovative and high quality solutions for the measurement of electrical parameters. Its flagship products - current and voltage sensors - are used in many applications for industry, traction, energy and automotive. For its part, Qualimatest is the leader, in Switzerland and France, in automated quality control solutions and equipment. They can be autonomous or integrated into an existing machine. The software and equipment are made by the Qualimatest team to best meet the needs of customers. Qualimatest has extensive experience in the watch, automotive, medical and rail industries.
Thirty years ago, the founders of LEM and Qualimatest, MM Jean-Pierre Etter and Luc Haenny were the first actors in this collaboration. Our companies have been collaborating regularly for more than 10 years. To date, about 20 projects have been carried out jointly.
The products to be tested are current sensors. The objective is to control the geometry and the spatial position of the pines. 
At the origin of the project, for the first time, we decided that Qualimatest develops and realizes standard "off-line" control modules integrating measurement, mechanics and electrical. This organization allows individual validation outside the line of systems before installing them on the automatic line. This organization has allowed the definition of a standard that can now be reused while optimizing costs and deadlines.
To significantly reduce false rejects, an algorithm called "Best Fit" developed by Qualimatest, LEM and Pillet Consulting has been implemented, it combines measurement results and statistics. The main idea is to calculate the position measurement reference according to the actual position of the pins in order to find the minimum error. This technology optimizes control to reduce the scrap rate.
LEM's teams have developed and manufactured a fully automatic production line of large-scale current sensors. The design and construction were carried out entirely in Plan-les-Ouates for deployment in Switzerland and Bulgaria. Two demand-specific measurement stations (QMTCheck-M4U) developed by Qualimatest control the conformity of manufactured products
- A 2D ½ measurement station in traditional optics with 3 cameras for the spatial geometry of pins with a measuring accuracy of 10μm
- 3D measurement station in white light interferometry for coplanarity of pins with a measuring accuracy of 10μm
Quality control is done directly on the production line. The advantage of this configuration lies in two points: 100% of the parts are controlled and the measurement results and their associated statistics guarantee a continuous correction of the production parameters in order to guarantee maximum productivity.

The measurement stations embark the Qualimatest QMTMesure-Expert software:
- High precision measurement by subpixel processing and geometry modeling
- High level of robustness of measurement with the removal of imperfections by filtering
- The measurement of complex features by geometric construction and calculations
- High-level features for performance and ease of use
This project incorporated several challenges including cadence, measurement accuracy and 3D control. The project is a success because all the objectives have been achieved.
Regarding the integration of innovative 3D technology, it has met the expectations in terms of metrology and industrial strength has been satisfactory for more than 24 months.

Traditional optical control mechanically integrated by Qualimatest
The station called 2D ½ embeds 3 surface cameras of resolutions 2, 5 and 8 megapixels. The optics of each camera is telecentric to eliminate perspective or parallax errors. This station provides all measurements (3 measurements per pin, typically 39 measurements) in 700 ms with an accuracy of 10μm in the 3 axes (Gage R & R of 10%).
QMT Vision InspectorA 3D optical control using the latest technologies available
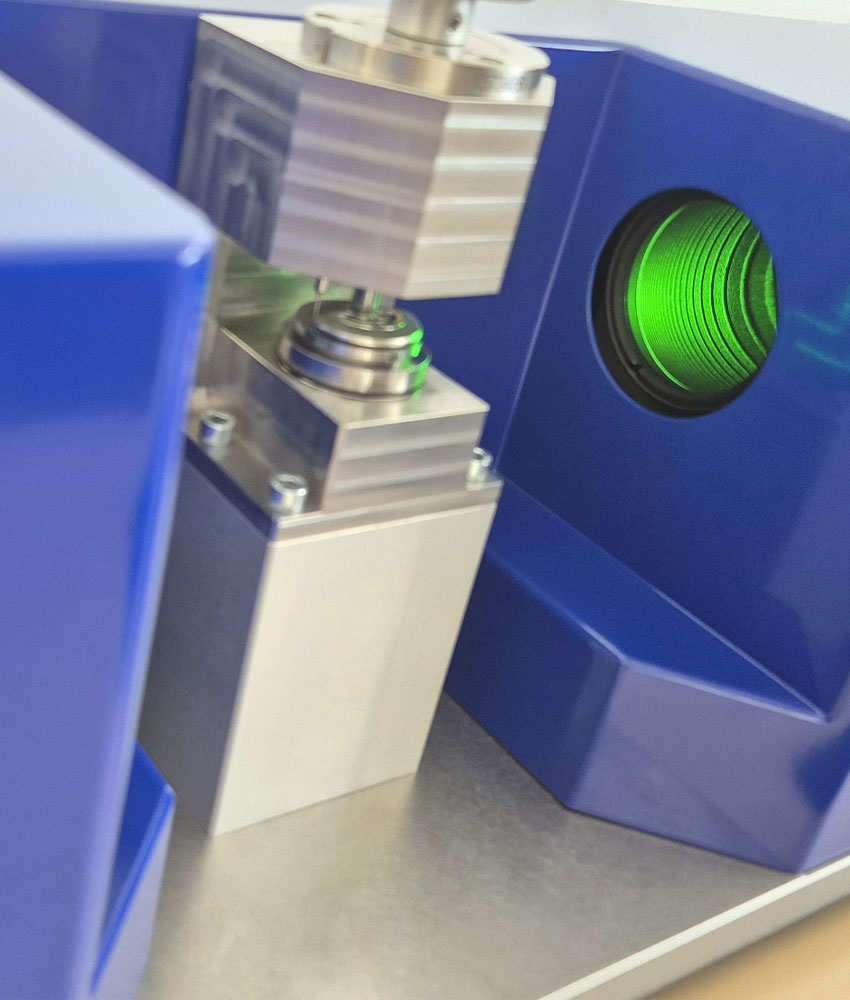
The 3D station is mainly dedicated to the measurement of coplanarity of pines. Each pin top must be contained between two planes 150μm apart. This high demand required the implementation of a 3D technology based on a white light interferometric principle. The measurement accuracy obtained is 10 microns (Gage R & R of 10%). This measurement solution is fast (1.2 seconds), non-invasive and non-contact. It provides three-dimensional and structural information of great precision. In addition, this technology is insensitive to differences in brightness of metal components.
QMT3DMeasure technology


